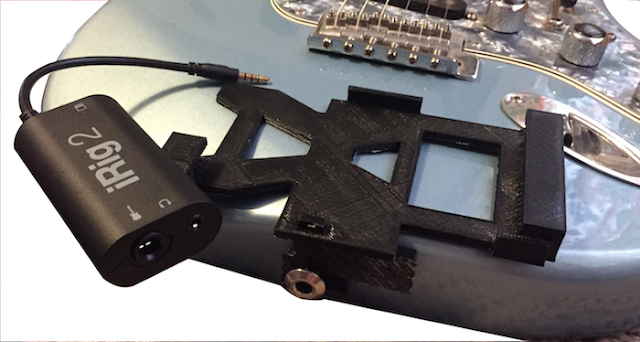
 Today I have been prototyping a holder for the iPhone on my guitar. I was playing around with LoopyHD (https://itunes.apple.com/us/app/loopy-hd/id467923185?mt=8) and was wanting to be able to have the controls close to me. With this program I can make a rhythm loop and then practice playing some leads over that.
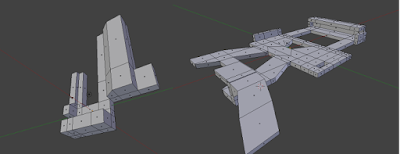
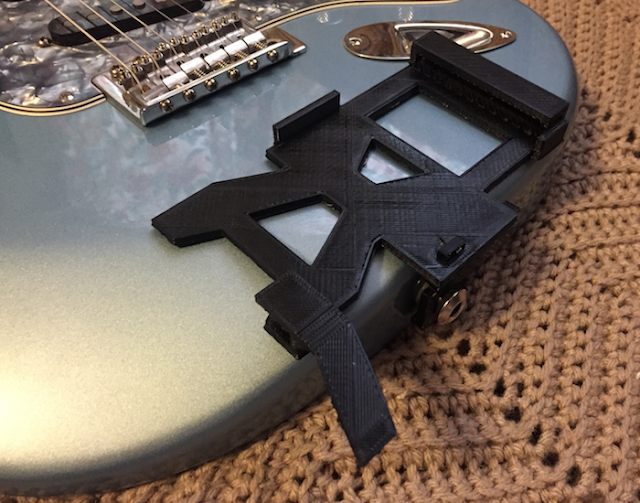
 My design so far consists of two chunks of plastic that were 3D printed and snapped together. The top portion holds the iPhone and the iRig2 together. The second chunk holds the unit on using the locking strap button. With dunlop strap locks, the strap is on the outside of the pin leaving a good area to attach more stuff. I am currently printing a new bottom chunk to help control the unit from rotating from the weight of the iPhone. I want this thing to be solid. The final touch will be adding felt to all the sides that touch the guitar.

If you want to make one of these things for your guitar, you can download the Blender and STL files.
https://drive.google.com/file/d/0Bw-316H4anXJOXFtbW9OSE5mMG8/view?usp=sharing.
You might need to modify the top portion to fit your phone. This holder was designed for the iPhone 6 but it should work for the 6s and 7 models since they have similar dimensions. The strap piece was designed for the Dunlop Straplock system http://www.jimdunlop.com/products/accessories/straplok. It should work with other strap buttons and the blender files included can be modified all you want.

Some final notes. This was printed with rafting which adds some width to the piece if you do not get it all pealed off. The portion that connects the two pieces takes that into account. If you are not printing with rafting or if you are awesome at getting that layer off, then you will need to adjust the model to have either a bigger nub or a smaller hole.
Happy printing and Keep on Rock'n,
Jeremy Skrdlant


